David has been building a beautiful coal loader for Brooks, WV, modeled after one on the Clinchfield. He came up with an ingenious air-powered method of filling an overhead hopper with dyed walnut shell grit from Horrible Freight.
There will be a long conveyor that loads coal from below the hopper over to the loader itself. For this David needed a drive pulley.
I won't go into the tribulations experienced in the early work. I volunteered to try to make an improved pulley to drive an elastic waistband belt with a Pittman gear motor.
I made two practice pieces that taught me a lot about how to
NOT go about the project.
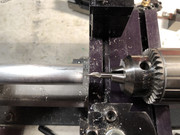
After some trepidation, I cut a long piece of aluminum and set about mangling it. First up, I worked to get it to run as true as possible in a Sherline scroll chuck. Aluminum is soft so alignment can sometimes be brought to true using subtle persuasion.
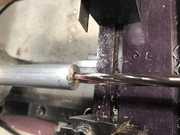
After taking a skim cut on the end of the rod, the next step was to locate the center of the material for a 1/4" hole to mate with the Pittman gear motor. This is done with a "center drill."
The conical indentation helps an ordinary drill to find a near perfect center. I used three stubby screw machine drills to start the hole and enlarge it.
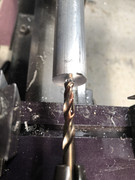
Drill bits are not very accurate and they usually cut oversize holes. I ordered a 1/4" chucking reamer to make a precise hole with about 0.001 clearance on the motor shaft (measured.)
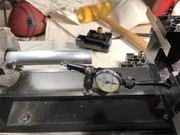
It turned out that with the Sherline rotary table mounted in their adjustable angle plate, there wasn't enough work volume left to mill the part. What's a mother to do? Order their right angle mount that takes up a lot less space on X axis.
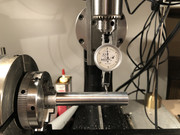
To make accurate grooves in the pulley, I needed to prove that the rotary table after adjustments ran square to the machine. First I make sure it is square to the X axis.
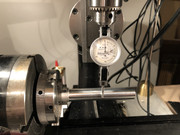
Next, test for square against the Z axis.
On to part 2
