Recent Posts

Pages: 1 2 [3] 4 5 ... 10
21
A&O Projects / Website Updated
« Last post by david on March 25, 2025, 09:43:49 PM »
Greetings-
It has been a long time since I was able to update the A&O website, but that has just been accomplished! Yeah!! I hope to not be so delinquent going forward; we'll see.
There are new categories added and probably an overabundance of data.
If we can figure how to do it, some video shorts will be posted on the Photo page.
Enjoy,
David Stewart
22
Member Projects / Re: MTSE a German narrow gauge RR
« Last post by MichaelHH on January 03, 2025, 08:35:05 AM »
Hello and Happy New Year !
At noon on Newyear MTSE steam engines joined the whistle up to welcome 200 years of railway in the UK
https://youtu.be/XnvDlfgzHvk?si=5gOrtEbw6AhMxBkH
For further details on all celebrations in the UK this year see
https://youtu.be/XnvDlfgzHvk?si=5gOrtEbw6AhMxBkH
or on social media #railway200 #whistleup200
Greetings from Hamburg
Michael
23
Member Operations / Re: German Operations on narrow gauge railroad
« Last post by david on December 02, 2024, 11:20:25 AM »
Very nice, Michael. You have captured the essence of prototype operations on your beautiful railroad. Great fun! I hope others in Deutschland enjoy it with you.

I so wish I had been home when you and your son Toby came by to visit the A&O, such as it is at this point. If I ever get back to Hamburg I'll let you know.

David
24
Member Operations / German Operations on narrow gauge railroad
« Last post by MichaelHH on December 02, 2024, 09:27:50 AM »
Hello,
my MTSE, narrow gauge railroad according prototype RüKB on German Island Rügen, operates strictly according " Zugleitbetrieb" which is quite similar to timetable and track warrant. If you are interested how I implemented it follow this link: https://www.0e-club-hamburg.de/mtse-michael/mtse-betrieb/
Unfortunately in German only, but google translator should work fine.
Greetings from beautiful Hamburg
Michael Schwertfeger
Modify message
25
Hello,
meanwhile my second layout, transportabel for exhibitions, is in a good stage to look at.
It consist of rolling stock according prototype of the Mansfeld Copper Mining Railway located in east Germany, but on an freelance layout. Most of the rolling stock still exist at todays museum raiway MBB in Klostermansfeld.
Please follow this link: https://www.0e-club-hamburg.de/mansfeld-michael/
Unfortunately in German only, but google translator should work fine.
Greetings from beautiful Hamburg
Michael Schwertfeger
26
A&O Operations / Re: Visitors from Germany
« Last post by MichaelHH on December 02, 2024, 08:19:14 AM »
It was really a great pleasure for us to visit and oprerate A&O Railroad. It will stay for long in our memories.
Thanks again to Dave and Bob for making it possible.
It is realy very sad that the distance between Hamburg and A&O is so big. I would love to regular join operation sessions.
I wish you all the best to keep everything rolling.
Greetings from Hamburg
Michael Schwertfeger
27
General Comments (visitors & members) / Re: LAYOUT UPDATE?
« Last post by ijmunro on November 06, 2024, 07:37:54 PM »
Appreciate the update Rick,
Ian
28
Member Projects / Re: Red Caboose GP9 remotor
« Last post by Bob on November 05, 2024, 06:56:45 PM »
After assembling one of the lighting blocks I quickly realized that having so many loose wires coming out of the back was not going to be fun to solder to a small prototyping "relay" board on which the dropping resistors were mounted. For one locomotive that might be OK. But I have a bunch of GP9s to build and David has a small fleet. Hmm... back to the drawing board?
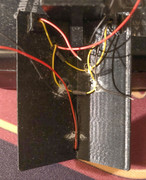


While feeling frustrated I saw a post by Mike DeBerg on O Gauge Railroading showing the interior of his new 2 Rail SD40-2 from Sunset. That was the cleanest DCC install I've seen.
https://ogrforum.com/topic/sunset-models-3rd-rail-sd40-2-an-inside-look

Sunset designed a new daughter board for the ESU 5L decoder. That custom board uses a bunch of JST XH connectors for wire management. A real incandescent light bulb turned on in my head... Why not have some custom PC boards made that could attach to the back of a lighting block?

From US vendors prototype quantities of PC boards can be quite expensive. Many 3D printing channels on Youtube are sponsored by a Chinese company out of Hong Kong, JLC PCB. I uploaded Gerber files from KiCad and got a quote for only $2 for 30 boards, including a $6 new customer discount. Including shipping the cost per board was less than $1.

I downloaded the current (and free!) KiCad software for schematic capture and PC board layout. It did not take long to arrive at a PC board design. That said, soldering the LEDs to the board would require reflow soldering, something I've never done at home.
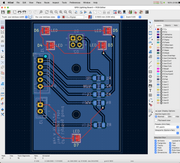

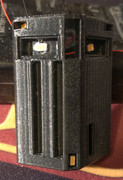
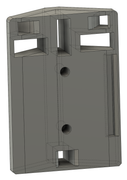
The lighting block was also modified to have open apertures for PC mounted LEDs. The two central mounting holes are sized for M2 threaded inserts.

Soldering tiny wires to the back of many surface mounted LEDs is not all that difficult. But how can one solder the LED to a PC board when the contacts are hidden on the bottom of the package?  That requires reflow soldering, in which a paste of solder and flux is applied to the PC board pads and the LEDs are set into the paste. Then the entire assembly either goes into a reflow oven (at a commercial facility) or at home on top of an inexpensive digitally controlled hot plate.

I bought a cheap digital hot plate from Amazon and in an afternoon reflow soldered 5 LEDs to each of the 30 prototype boards.

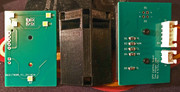
Here are a sample of the results. On the left, one of the reflow boards with 5 SMT LEDs. Center, a modified lighting block with clear apertures for LEDs mounted to the PC board. Right, the back of the PC board with a pair of JST connectors. The upper one connects back to the decoder board. The lower connector powers ground (truck) lights, if used.
29
A&O Operations / Visitors from Germany
« Last post by Bob on November 05, 2024, 12:51:59 PM »
On Sept 19, 2024 Michael Schwertfeger and his son Toby stopped by the A&O for a quick tour. They were in he middle of a cross-country vacation drive that started at the California Railroad Museum and ended at the Strasburg. Unfortunately David was out of town so I stepped in as host.

Toby is a train driver in real life, operating freight locals in a fairly small area. These are known as "around the church" operations.

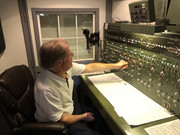
Michael sat down at the CTC machine and gave it a try. That lead to a lengthy discussion of US&S signaling in the US.


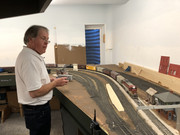
End of the run in Ricksburg.


Both gentlemen appeared to enjoy their time at the A&O and had many complimentary things to say as we toured the layout.
30
A&O Projects / David's C430 gets sound
« Last post by Bob on November 05, 2024, 12:37:21 PM »
David's Overland C430 has been a workhorse on both A&O 1.0 and now 2.0. It still had an NCE 408 non-sound decoder and that needed to change.

It has been quite a while since I peeked inside the locomotive.


This engine weighs a ton and has seen lost of miles on the layout, to the point that some plating has worn off the wheels.


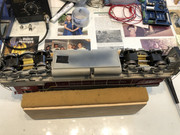
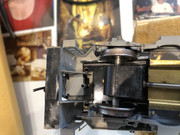
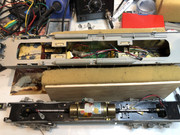
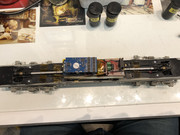
First views inside.


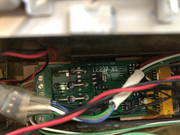
An ancient Lenz back-EMF LE230 decoder powered the unit since A&O 1.0.


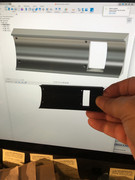
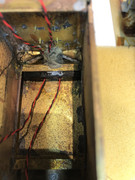
A 3D printed saddle was designed in Fusion 360 to hold an ESU 5L decoder above the motor.


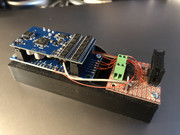
The decoder has been mounted on the saddle. Green connectors bring track power to the decoder. A 10 pin ribbon cable connector will distribute lighting to the front and rear of the locomotive.


Not shown are two remote lighting boards that attach to the ribbon cable. Each board holds the LED dropping resistors. Individual LED wires attach to this board.

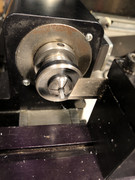
Turning class light lenses.


The decoder is now in place.


Some LEDs such as those for the rear number boards were held in place using 3D printed lighting blocks. The big blob of gray clay holds 3mm rear headlight LEDs in place and blocks cross-light pollution between the number boards and the headlights. Still to be installed here are rear class lights.


Eventually the speaker was mounted to a 3D printed block to the roof of the shell, with sound escaping through the radiator intake grills on each side of the car body.

Sorry, but I didn't document the rest of the install...
Pages: 1 2 [3] 4 5 ... 10