Recent Posts

Pages: 1 [2] 3 4 ... 10
11
Member Projects / Re: Weaver RS3 work in progress
« Last post by Craig on July 04, 2025, 05:50:29 PM »
What printed pads are those Bob?  Can you post a picture?
12
Member Projects / Re: Weaver RS3 work in progress
« Last post by Bob on June 30, 2025, 07:14:26 PM »
Hopefully pretty soon. I originally wanted to print the final molds in ABS, but even with supports some of the overhangs are coming out too gnarly to use. Now I'm starting to print what I hope to be final parts in black PLA. Jeff Kraker successfully pours his using thin PLA molds. However, he does the pour with the mold sitting in a bowl of ice water. I do expect the Wood's metal to expand about 1% as it cools, caused by the high bismuth content.

Over the last few days I have found numerous tweaks and improvements to simplify things such as wire management. That seems never ending.

I did print the motor mount in ABS so that it would be more resistant to heat from the motor. Weaver's OEM body mounts are horribly undersized and weak. They crack as soon as the provided self-tapping screws are inserted. I made ABS covers that slip over the OEM features with brass threaded M2 heat stake inserts. These are in ABS so that they can be solvent welded to the styrene locomotive shell.

I'm wondering what to use to remove Weaver's pad printed lettering without destroying the paint below. Any thoughts?
13
Member Projects / Re: Weaver RS3 work in progress
« Last post by Craig on June 30, 2025, 05:56:34 PM »
Looks great Bob!!!  Any ideas when the Cerrobend will get poured?
14
Member Projects / Weaver RS3 work in progress
« Last post by Bob on June 25, 2025, 09:21:42 PM »
I have an old Weaver RS3 "kit" that needs a Portescap coreless motor so that I can install an HO DCC decoder. There is not room for an ESU 5L decoder, but one of their HO decoders can fit. However, the OEM Pittman motor draws too much current for an HO decoder. What to do? Replace the motor.

This turned into a major 3D printing project. What we see here is a work in progress. A lot more features need to be added to the Fusion 3D model.

The red "bathtub" printed parts are actually molds for Cerrobend weights that replace the OEM weights and increase the weight of the model by about 1/2 pound. No doubt the details will change as I work on the models in Fusion 360.


I also ordered some steel Woodruff key stock from McMaster and that will provide about 2.5 ounces of frame stiffeners to prevent the weak Weaver frame from bowing and cracking.

What prompted this project is a request from the Poobah David to put better sound in his RS3 and also in an unbuilt RS3 kit. This proved a great opportunity for me to re-learn what I forgot in using Fusion 360.
15
A&O Operations / Guest operators from Tulsa and KC
« Last post by Bob on April 02, 2025, 02:39:39 PM »
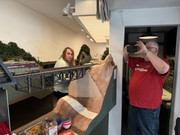
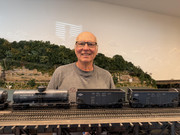
On March 31st the A&O hosted a morning + afternoon op session for an entourage of experienced operators from Tulsa and Kansas City. A contingent of A&O regulars also attended as consultants. Special thanks to KT for a fabulous lunch.

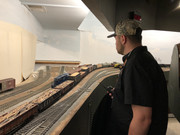
Sorry I don't have names for all these faces, but here are the few photos I managed to take during the session. And remember that if you want to see a closeup of any photo thumbnail, just click on it to zoom in.

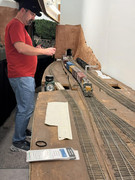
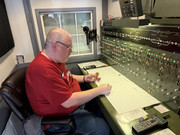
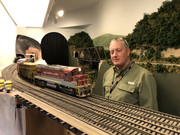
Jared held down the Dispatchers's desk. I trained him on the peculiarities of the A&O machine and he did a fantastic job.


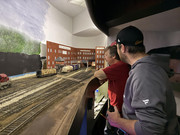
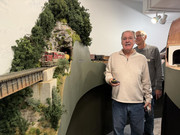
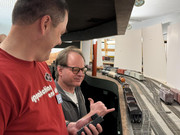
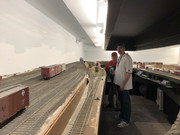
Here are more grab shots in no particular order.

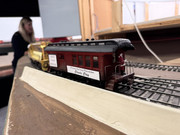
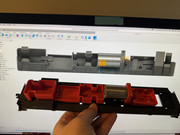
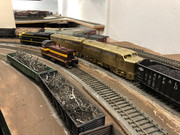
An empty coal train headed north across the Twin Creek Viaduct. Soon an impromptu photo line of folks stacked up. These locomotives built from P&D kits appeared on the cover of a 2006 issue of Model Railroader. Each currently has a 2" high-bass speaker in an enclosure.

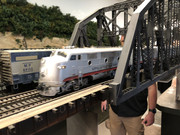
On the distant right the Grand Floridian passenger train would soon pass over the Ohio River on the connecting bridge.


I overheard several comments about the sound coming from the "giant speakers" in A&O locomotives.

The Floridian soon crossed the Ohio River behind two of David's Atlas F3s. These sport Tang Band T1-2025 speaker modules that produce a lot of bass due to their large passive radiators.


A general freight heads from West Virginia to Ohio as it starts across the Ohio River bridge complex behind Alco C425 #475. The dynamic brakes would soon whine to take the train down the ruling grade towards Millport OH.


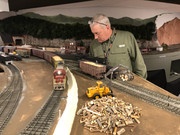
A loaded coal train just arrived at the Hatfield Coal Company rotary. Here an operator pulls off the caboose and parks it safely on the caboose arrival track.  Soon the loads will be pulled off the tail of the arriving train and shoved across the Whiting Rotaside for emptying. These are all live loads.

The rotary is controlled using the green circled pushbutton visible on the fascia. Once started the dump cycle runs automatically and is synchronized with sound recorded from a real Whiting Rotaside dumper.


Here's the road power, an Alco FA1-FB1-FA1 consist that brought the loads to the rotary arrival track.


Later the B&O ran north on the A&0 mainline to exchange a few cars at International Paper, then it headed into Millport for the midpoint of that turn.


Millport yardmaster Craig herded cats.


What hump?


Heading to the home terminal past the end of CTC.


Operating at the Morrison prep plant. Dirty coal in, clean coal out.


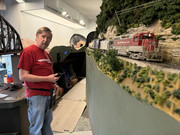
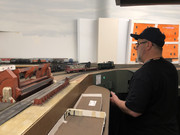
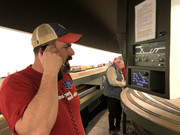
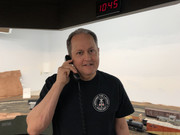
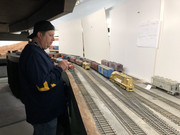
John Parker held down the Ricksburg yard job. Here he answers the Dispatcher on the telephone system.


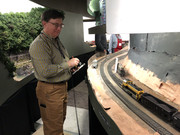
Ricksburg sorts through car cards to plan his next moves with the Alco S4 yard switcher far left.


An aging Alco RS36 switched the 28 foot long paper mill. That job can take all day! (I've been there and done that job...)

16
A&O Projects / Re: Website Updated
« Last post by david on March 29, 2025, 01:01:34 PM »
Awesome wife Katie figured out the magic words for putting up the video shorts. Enjoy. More to come.
David
17
A&O Projects / Website Updated
« Last post by david on March 25, 2025, 09:43:49 PM »
Greetings-
It has been a long time since I was able to update the A&O website, but that has just been accomplished! Yeah!! I hope to not be so delinquent going forward; we'll see.
There are new categories added and probably an overabundance of data.
If we can figure how to do it, some video shorts will be posted on the Photo page.
Enjoy,
David Stewart
18
Member Projects / Re: MTSE a German narrow gauge RR
« Last post by MichaelHH on January 03, 2025, 08:35:05 AM »
Hello and Happy New Year !
At noon on Newyear MTSE steam engines joined the whistle up to welcome 200 years of railway in the UK
https://youtu.be/XnvDlfgzHvk?si=5gOrtEbw6AhMxBkH
For further details on all celebrations in the UK this year see
https://youtu.be/XnvDlfgzHvk?si=5gOrtEbw6AhMxBkH
or on social media #railway200 #whistleup200
Greetings from Hamburg
Michael
19
Member Operations / Re: German Operations on narrow gauge railroad
« Last post by david on December 02, 2024, 11:20:25 AM »
Very nice, Michael. You have captured the essence of prototype operations on your beautiful railroad. Great fun! I hope others in Deutschland enjoy it with you.

I so wish I had been home when you and your son Toby came by to visit the A&O, such as it is at this point. If I ever get back to Hamburg I'll let you know.

David
20
Member Operations / German Operations on narrow gauge railroad
« Last post by MichaelHH on December 02, 2024, 09:27:50 AM »
Hello,
my MTSE, narrow gauge railroad according prototype RüKB on German Island Rügen, operates strictly according " Zugleitbetrieb" which is quite similar to timetable and track warrant. If you are interested how I implemented it follow this link: https://www.0e-club-hamburg.de/mtse-michael/mtse-betrieb/
Unfortunately in German only, but google translator should work fine.
Greetings from beautiful Hamburg
Michael Schwertfeger
Modify message
Pages: 1 [2] 3 4 ... 10